
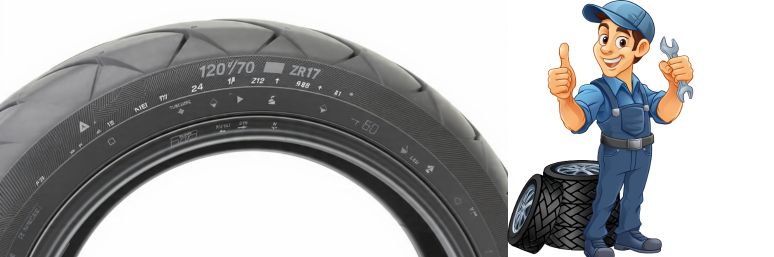
Ever looked at your motorcycle tyre and wondered what all those numbers, letters, and codes really mean?
They aren’t random.
They’re a technical specification blueprint covering load capacity, speed capability, tyre compound, carcass construction, inflation pressure limits, homologation approval, and more.
In reality, the markings represent a detailed tyre sidewall code that engineers use to define motorcycle tyre size, structural design, and compatibility with specific motorcycles.
And if you ride seriously, you need to understand it.
Let’s decode it properly.
Motorcycle tyre sidewall markings are not just numbers.
They represent:
- Engineering design
- Safety certification
- Load science
- Heat tolerance
- Structural limits
- Performance capability
They also provide critical information about rim compatibility, tubeless marking, rotation arrow orientation, and proper tyre inspection procedures.
Once you understand:
Tyre compound, ply rating, carcass construction, inflation pressure, homologation approval, sidewall stiffness, rolling resistance, and aquaplaning resistance — along with factors such as tread pattern, tyre wear indicator, and tyre service life
You stop riding blindly.
And start riding intelligently.
Why Motorcycle Tyre Sidewall Information Matters More Than You Think
Your tyre is your only connection to the road surface.
That tiny contact patch handles:
- Acceleration
- Braking
- Lean angles
- Stability
- Heat buildup
It also manages complex forces including torque transfer, contact pressure distribution, and dynamic stability during aggressive riding or emergency braking.
The sidewall tells you:
- Correct tyre load capacity
- Approved speed symbol
- Maximum inflation pressure
- Manufacturing age
- Construction method
- Regulatory compliance like E-mark certification
It may also include information about motorcycle tyre standards, recommended rim compatibility, and indicators used for proper tyre pressure monitoring.
Ignore it?
You risk poor sidewall stiffness, excess sidewall flex, overheating, and even structural failure caused by excessive tyre deformation.
Breaking Down a Complete Tyre Code (Beyond the Basics)
Example:
180/55 ZR17 73W
Let’s expand deeper.
- 180 → Width (mm)
- 55 → Aspect ratio
- ZR → Radial construction rated for high speed
- 17 → Rim diameter
- 73 → Load index (check against tyre load capacity chart)
- W → Speed rating (verify using a speed symbol chart)
But that’s just the surface.
Modern tyres also include:
- Maximum inflation pressure (PSI and Bar measurement)
- Cold tyre pressure recommendation
- Ply rating
- Homologation code
- Tyre compound identification
- E-mark certification number
They may also display additional identifiers such as tubeless marking, rotation arrow, and location of the tyre wear indicator.
Tyre Width & Handling Dynamics
Width affects:
- Grip
- Stability
- Lean transition speed
- Rolling resistance
It also influences contact pressure distribution and how the tyre’s tread block design interacts with the road surface.
Wider tyres increase grip but may alter speedometer calibration and steering geometry.
They may also influence load distribution across the tyre’s tread pattern.
Always match factory specs unless you understand geometry changes.
Aspect Ratio & Sidewall Performance
Lower aspect ratio:
- Reduced sidewall flex
- Sharper turn-in response
- Better aquaplaning resistance
Higher aspect ratio:
- Increased comfort
- More impact absorption
Aspect ratio also affects tyre deformation and resistance to centrifugal force during high-speed riding.
Radial vs Bias – Engineering Difference
Radial:
- Layers run perpendicular
- Better heat control
- Improved temperature rating
Bias:
- Crisscross ply layers
- Higher ply rating
- Stronger for heavy cruisers
Radial tyres generally offer improved dynamic stability.
Load Index & Real-World Weight Management
Load index = maximum supported weight.
But here’s what many riders miss:
It assumes correct cold tyre pressure.
Underinflation increases heat cycling, reducing overall tyre service life.
Speed Rating & Heat Tolerance
Speed symbol isn’t just about speed.
It reflects:
- Internal carcass construction
- Heat resistance
- Structural durability
- Temperature rating
During high-speed riding tyres experience significant centrifugal force.
DOT Code, E-Mark & Homologation
DOT = Manufacturing date.
Also check:
- E-mark certification (European safety compliance)
- Homologation code (bike-specific approval)
These certifications confirm compliance with global motorcycle tyre standards and validated rubber compound formulation.
Tyre Compound & Dual Compound Technology
Modern tyres may indicate:
- Tyre compound type
- Dual compound tyres
- Performance grade
The rubber compound formulation directly affects grip, durability, and heat resistance.
Directional Arrows & Aquaplaning
Directional tyres improve:
- Water evacuation
- Aquaplaning resistance
- Wet stability
The rotation arrow ensures the tread pattern evacuates water correctly.
Tyre Mounting: Bead Area & Balancing
Proper mounting requires attention to:
- Bead area integrity
- Tyre balancing
- Wheel alignment
The tyre must seat properly on the rim bead seat for airtight sealing and structural stability.
Common Mistakes Riders Still Make
- Ignoring maximum inflation pressure
- Not checking homologation codes
- Overlooking tyre compound
- Ignoring tyre load capacity chart
- Mixing radial and bias constructions
- Skipping regular tyre inspection
- Ignoring the tyre wear indicator
Choosing the Right Replacement Tyre (Advanced Checklist)
- Match width & profile
- Verify load capacity chart
- Confirm speed symbol chart
- Check E-mark certification
- Confirm homologation code
- Understand compound type
- Check manufacturing date
- Set correct cold tyre pressure
- Inspect tread depth and tyre wear indicator
- Confirm rim compatibility